
This article will guide you through implementation of a custom dropdown filter that supports thousands of values via pagination. To achieve this, we will integrate GoodData’s Accelerator Toolkit with the react-select-async-paginate (RSAP) library.
Let us first spin up a React application using the Accelerator Toolkit. Run the following command in terminal:
npx @gooddata/create-gooddata-react-app
You will be prompted with some questions, be sure to set up your hostname correctly. My example here is using https://ramirez.internal.gooddata.com as the hostname:
? What is your application name? my-app
? What is your hostname? I have a custom hostname
? Insert your hostname: https://ramirez.internal.gooddata.com
? What is your application desired flavor? JavaScript
Next we will cd into the application directory and add the RSAP libraries:
cd my-app
yarn add react-select@3.1.0 react-select-async-paginate@0.3.14
After adding the necessary libraries, we can start the application:
yarn start
You will be met by a Welcome page from the Accelerator Toolkit:

If a browser does not automatically pop up after starting the application, you can go to the application URL in the browser manually
This example will use GoodData.UI at a very low level. We will only be using the backend / API and not any of the visual components. The RSAP library will actually render the dropdown filter. You will need a workspace with data. Any attribute with values loaded to it will work.
Let’s make a few changes to the application before we get to the dropdown filter:
In /src/constants.js
Double check that backend is set to the domain that you will be working with and set workspace to the workspace you will be working with.
In /src/routes/AppRouter.js
Find the line that says DELETE THIS LINE, and delete it.
This removes the redirect to the welcome page and sets up Home as the default landing page. We will be doing our work on the Home page.
Find the two sections that have the comment:
Uncomment the next line if you want to redirect unauthorized users to login form
Uncomment those sections to redirect the user to the login page if the user is not already logged in.
Copy and paste the code below to /src/routes/Home.js
import React, { useState, useEffect } from "react";
import { useBackend } from "../contexts/Auth";
import { useWorkspace } from "../contexts/Workspace";
import AsyncPaginate from 'react-select-async-paginate';

import Page from "../components/Page";

// The number of values that will be fetched per page
const PAGE_SIZE = 10;

// The label ID of the attribute
const ATTRIBUTE_LABEL = "label.location.locationid";

const defaultFilterOptions = { limit: PAGE_SIZE, offset: 0, filter: '' };

// helper method to parse the paging metadata from the api response
const getPagingInformation = (response) => {
    const { paging } = response.validElements;
    const { count } = paging;
    const total = Number.parseInt(paging.total, 10);
    const prevOffset = Number.parseInt(paging.offset, 10);

    return {
        count,
        total,
        prevOffset,
    };
};

const getObjectIdFromUri = (uri) => {
    const match = /\/obj\/([^$/?]*)/.exec(uri);
    return match ? match[1] : null;
};

const Home = (props) => {
	const [value, onChange] = useState([]);
	const [objId, setObjId] = useState(null);
	const backend = useBackend();
	const { workspace } = useWorkspace();

	// Get Object ID from Identifier / elements API requires Object ID
	useEffect(() => {
		backend.sdk.md.getUrisFromIdentifiers(workspace, [ATTRIBUTE_LABEL])
			.then((response) => setObjId(getObjectIdFromUri(response[0].uri)));
	}, [workspace, backend]);

    const loadOptions = async (search, prevOptions, { offset }) => {

    	// get settings for elements API call
    	const optionsWithUpdatedPaging = {
            ...defaultFilterOptions,
            offset
        };

        // call elements API
        const response = await backend.sdk.md.getValidElements(
	        workspace,
	        objId,
	        optionsWithUpdatedPaging
	    );

        // get the options / values returned
    	const elements = response.validElements.items.map(({ element }) => ({
            label: element.title,
            value: element.uri,
        }));

    	// get the paging metadata from elements API call
        const { count, prevOffset, total } = getPagingInformation(response);
        const hasMore = prevOffset + count < total;
        const newOffset = prevOffset + count;

    	return {
            options: elements,
            hasMore,
            additional: {
                offset: newOffset
            }
        };
    };

    return (
		<Page>
			Paging Filter
			<AsyncPaginate
				value={value}
				loadOptions={loadOptions}
				isMulti
				closeMenuOnSelect={false}
				onChange={onChange}
				additional={{ offset: 0 }}
			/>
	    </Page>
    );
};

export default Home;
There are two variables that need to be set:
PAGE_SIZE
This sets the page size. Set this to something small at first to see the paging work.
ATTRIBUTE_LABEL
As previously mentioned, you will need a workspace with data. This string is set to the attribute label identifier of the attribute you want to use as a filter.
Once setup, save /src/routes/Home.js and go to the application. You should see a dropdown filter that loads new pages of data once the scroll bar hits the bottom. Remember to set PAGE_SIZE to something small so you can easily see the paging in action!
Let’s look closer at my example. PAGE_SIZE is set to 10 and I have 20 total values. This results in 2 pages of data.
Response (Page) 1:

The paging metadata contains 3 values.
count
The number of values returned in the response.
total
The total number of values for the attribute label.
offset
The offset from the starting value. We see here that it is 0 since this is the first page.
The items array contains the first 10 values, from index 0 to 9.
Response (Page) 2:
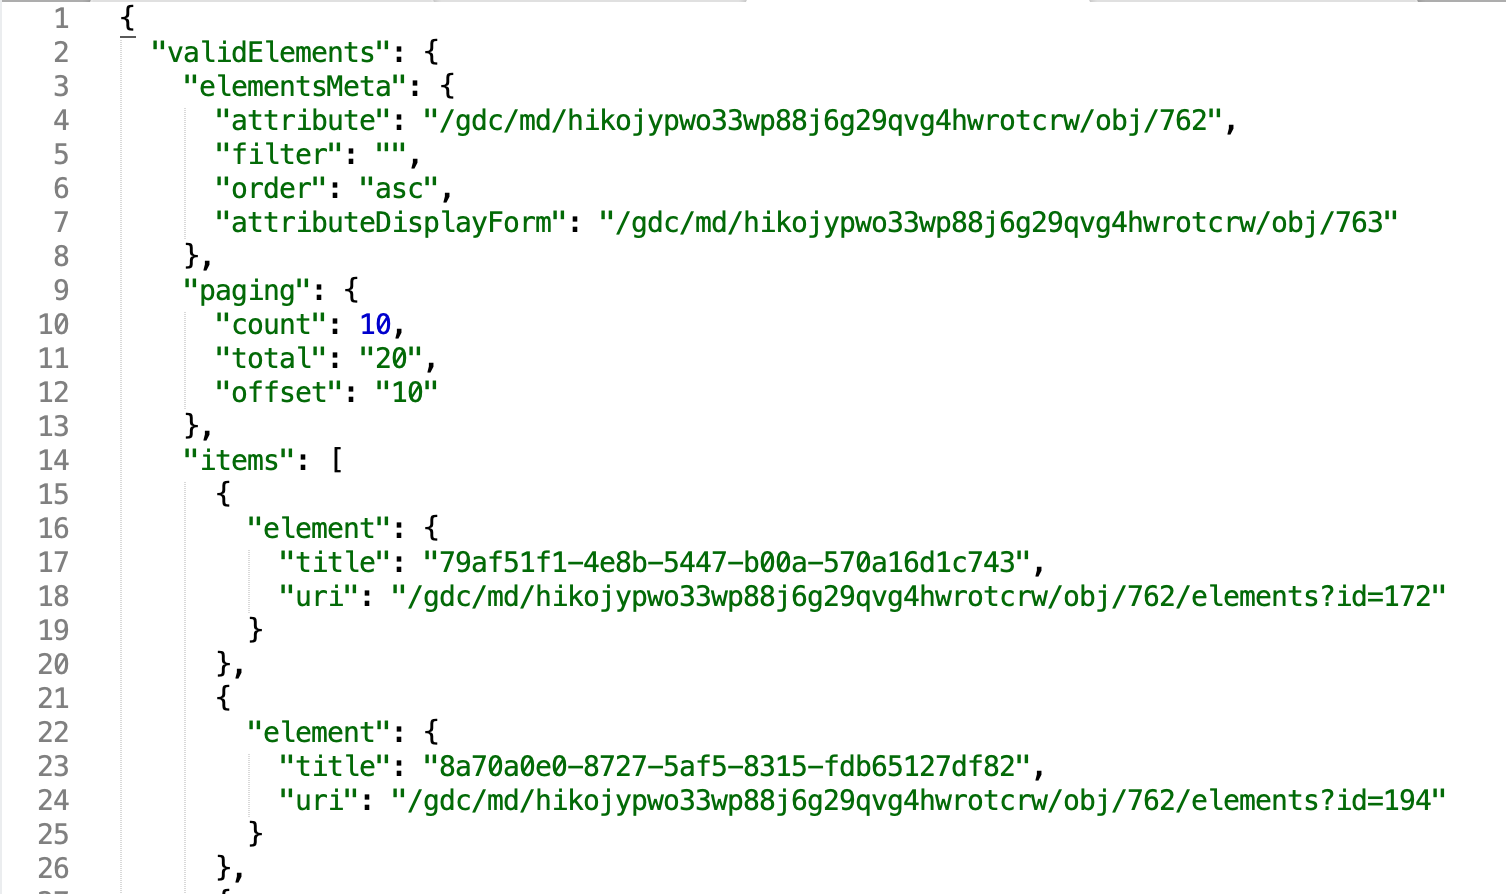
Here we see that only the offset has changed. The items array contains the next 10 values, from index 10 - 19. We know this is the last page because: offset + count = total. A similar check occurs with variable hasMore in the code. This tells the code that we no longer need to load any new values, since we have them all.
This example is a great starting point for implementing custom filters into your GoodData.UI application. Thanks for reading / coding!